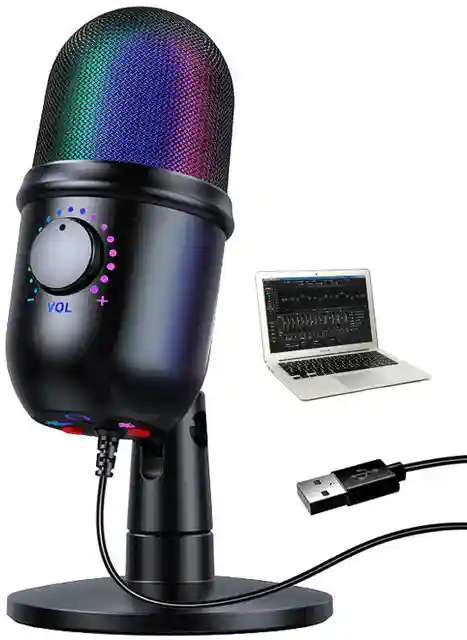
A microfon studio is one of the most important pieces of equipment for anyone who wants to create high-quality audio recordings. Whether you are a singer, musician, podcaster, YouTuber, voice-over artist, streamer, or music producer, choosing the right microphone can make a major difference to the clarity and quality of your recordings.
Although “microfon studio” is commonly searched as a keyword, the standard English term is studio microphone. A studio microphone is designed to capture vocals, instruments, speech, podcasts, narration, and other sounds with greater detail than many basic built-in or consumer microphones.
A complete recording setup does not necessarily have to be expensive. A microphone, audio interface, computer, headphones, suitable recording software, and a reasonably controlled room can form the foundation of a capable home studio.
What Is a Microfon Studio?
The term microfon studio generally refers to a microphone used in a recording studio or home recording environment. Unlike microphones designed mainly for public speaking or live performances, studio microphones are often selected for their ability to capture detailed sound.
A studio microphone can be used for vocals, acoustic instruments, podcasts, voice-over work, interviews, music production, audiobooks, online content, and other recording applications.
The microphone is the first major part of the recording signal chain. Sound reaches the microphone, the microphone converts that sound into an electrical signal, and an audio interface can then send the signal to a computer for recording and processing.
This means that selecting an appropriate microphone is important, but it is not the only factor that determines recording quality.
Why Is a Good Microfon Studio Important?
A good microfon studio can capture the character, detail, dynamics, and tone of a voice or instrument more effectively. However, the most expensive microphone is not automatically the best choice for every recording environment.
The room itself can have a major impact on the final recording. Reflections from walls, floors, ceilings, desks, and other hard surfaces can become part of the recorded signal. Microphone technique and positioning therefore matter almost as much as microphone selection.
For beginners, it is often better to create a simple and controlled recording environment before spending heavily on premium equipment.
Main Types of Studio Microphones
There are several types of microphones available for studio recording. The two most common categories for beginners are dynamic and condenser microphones.
| Microphone Type | Main Characteristics | Common Uses |
|---|---|---|
| Dynamic | Durable and generally less sensitive | Vocals, podcasts, broadcasting |
| Condenser | Sensitive and detailed | Studio vocals, instruments, voice-over |
| USB | Connects directly to compatible devices | Podcasts, streaming, home recording |
| XLR | Connects through an audio interface | Professional recording |
| Ribbon | Smooth and distinctive sound | Instruments, specialized recording |
Choosing between these types depends on the recording environment, application, budget, and desired sound.
Dynamic Microfon Studio
A dynamic microphone is a popular choice for vocals, speech, podcasting, broadcasting, and recording in rooms that are not acoustically treated.
Dynamic microphones are generally less sensitive than condenser microphones, which can make them useful when you want to reduce the amount of room sound entering the recording.
For a beginner working in a bedroom or ordinary home environment, a dynamic microphone can be a practical starting point. Recent home-studio guidance also recommends directional dynamic microphones for untreated rooms because they can help reduce unwanted room sound.
Condenser Microfon Studio
Condenser microphones are widely used in professional studios because they can capture detailed and nuanced sound.
They are commonly used for lead vocals, acoustic guitar, piano, voice-over work, and other sources where capturing detail is important.
However, their sensitivity can also mean that they capture more of the surrounding environment. This makes room acoustics particularly important when using a condenser microphone.
Many condenser microphones also require phantom power from an audio interface or mixer.
USB Microfon Studio
A USB microphone is designed to connect directly to a computer or another compatible device without requiring a traditional external audio interface.
This makes USB microphones convenient for beginners who want to start recording quickly.
USB microphones can be useful for:
- Podcasting
- YouTube videos
- Streaming
- Online lessons
- Voice-over recording
- Video calls
- Basic music recording
For a single-person recording setup, USB can provide a simple path from microphone to computer. However, people planning to expand into multi-microphone recording or more advanced studio production may prefer an XLR-based system.
XLR Microfon Studio
An XLR microphone connects to an audio interface, mixer, or compatible preamp rather than directly to a computer.
A typical XLR recording chain looks like this:
Microphone → XLR Cable → Audio Interface → Computer → Recording Software
This setup provides flexibility for people who want to upgrade their recording system over time.
An audio interface also provides microphone preamplification and converts the incoming analog signal into digital audio for the computer.
Microfon Studio for Vocal Recording
Vocals are one of the most common reasons people purchase a studio microphone.
When recording vocals, microphone placement can make a substantial difference. Instead of placing the microphone randomly, the vocalist should experiment with distance and angle while listening to the resulting recording.
A microphone can be positioned slightly away from the direct path of the singer’s breath to help reduce harsh plosive sounds. A pop filter can also be useful for controlling strong bursts of air from sounds such as “P” and “B.”
The correct distance depends on the microphone and vocalist, but maintaining a consistent position helps produce a more consistent recording.
Microfon Studio for Podcasting
Podcasting requires clear and understandable speech rather than simply the most detailed possible recording.
For a home podcast setup, a dynamic microphone can be an attractive option because it can reduce the amount of unwanted room sound when used close to the speaker.
A basic podcasting setup can include:
| Equipment | Purpose |
|---|---|
| Studio microphone | Captures speech |
| Microphone stand | Keeps microphone stable |
| Pop filter | Helps control plosive sounds |
| Audio interface | Connects XLR microphone to computer |
| Closed-back headphones | Monitoring during recording |
| Computer | Recording and editing |
| DAW/software | Audio production |
This setup can be expanded later as the podcast grows.
Microfon Studio for YouTube and Content Creation
YouTubers and content creators often need a microphone that produces clear speech while minimizing distracting background noise.
A studio microphone can be useful for:
- Tutorials
- Educational videos
- Product reviews
- Gaming videos
- Voice-over videos
- Documentary content
- Interviews
- Short-form videos
The microphone should be positioned close enough to capture the speaker clearly without making the recording uncomfortable or visually distracting.
Microfon Studio for Music Production
Music production often requires different microphones for different instruments and recording situations.
A vocalist may prefer one microphone, while an acoustic guitar, drum kit, piano, or amplifier may benefit from another microphone type or placement.
There is no single microphone that is ideal for every instrument. Microphone selection and positioning are partly creative decisions, and professional microphone techniques often involve experimenting with different positions to find the desired tonal balance.
How to Set Up a Microfon Studio
Setting up a microfon studio does not require a huge room or expensive equipment.
Start by selecting a quiet part of the room. Avoid placing the microphone directly next to hard reflective surfaces where possible.
A simple setup process is:
Step 1: Choose the recording space
Select a room with relatively low background noise and fewer strong reflections.
Step 2: Position the microphone
Place the microphone at a comfortable height and experiment with its distance from the speaker or instrument.
Step 3: Connect the microphone
Connect an XLR microphone to an audio interface or connect a USB microphone directly to the appropriate device.
Step 4: Connect headphones
Closed-back headphones can help you monitor your recording without allowing the playback to leak significantly into the microphone.
Step 5: Adjust the input level
Set the gain so that the recording is strong and clear without clipping.
Step 6: Make a test recording
Record a short sample before beginning the actual session.
Step 7: Listen carefully
Check for background noise, echo, distortion, plosive sounds, and unwanted room reflections.
Microphone placement should be treated as part of the creative recording process rather than simply following one universal position.
Room Acoustics for a Microfon Studio
One of the biggest mistakes beginners make is concentrating entirely on the microphone while ignoring the room.
A microphone records sound from the environment as well as the intended source. Hard walls and surfaces can produce reflections that change the character of the recording.
Basic acoustic improvements can include:
- Curtains
- Rugs
- Soft furniture
- Bookshelves
- Acoustic panels
- Strategic microphone positioning
- Reducing unnecessary background noise
You do not necessarily need professional soundproofing to begin recording. Acoustic treatment and soundproofing are different concepts. Treatment controls reflections inside the room, while soundproofing is designed to reduce sound entering or leaving the space.
Recent home-studio guidance similarly emphasizes that room acoustics can have a larger impact on recordings than simply upgrading to a more expensive microphone.
Microphone Placement Tips
Microphone placement can change the sound significantly.
Consider these basic tips:
- Keep the microphone stable on a suitable stand.
- Avoid touching the microphone during recording.
- Experiment with distance.
- Use a pop filter for vocal recording.
- Avoid placing the microphone extremely close to reflective surfaces.
- Reduce background noise before recording.
- Record test takes before the main session.
Professional microphone guidance recommends experimenting with microphone position, distance, isolation, and microphone choice to find the desired sound.
Microfon Studio Equipment Checklist
If you are building your first recording setup, the following checklist can help.
| Equipment | Beginner Priority |
|---|---|
| Microphone | Essential |
| Audio Interface | Essential for XLR microphones |
| XLR Cable | Essential for XLR microphones |
| Microphone Stand | Essential |
| Headphones | Highly recommended |
| Pop Filter | Recommended for vocals |
| Computer | Essential for computer-based recording |
| DAW | Essential for recording/editing |
| Acoustic Treatment | Highly useful |
| Studio Monitors | Useful upgrade |
A basic studio does not need every piece of equipment immediately. Building the core signal chain first can be more practical than purchasing a large amount of equipment at once.
How Much Does a Microfon Studio Setup Cost?
The cost depends on the equipment and recording goals.
A basic home recording setup can be created at a relatively modest budget, while professional studios can cost considerably more.
For Indian buyers, current 2026 home-studio guides commonly place practical beginner setups in the tens of thousands of rupees, with larger setups increasing substantially depending on the microphone, interface, headphones, monitors, and acoustic treatment selected.
| Setup Level | Suitable For |
|---|---|
| Entry Level | Basic voice recording and podcasts |
| Beginner | YouTube, streaming and music demos |
| Intermediate | Serious music production and voice-over |
| Professional | Commercial recording and production |
The best approach is to buy equipment according to your actual recording needs rather than purchasing the most expensive microphone available.
Common Mistakes When Buying a Microfon Studio
Many beginners make the same mistakes when building a recording setup.
Buying the most expensive microphone first: A premium microphone cannot completely fix poor room acoustics.
Ignoring microphone placement: Moving a microphone only a small distance can noticeably change the recorded sound.
Choosing equipment without considering the room: A highly sensitive microphone may capture unwanted environmental noise in an untreated space.
Skipping headphones: Monitoring is important when recording because you need to hear noise, distortion, and unwanted sounds.
Buying too much equipment: Beginners often purchase equipment that they do not yet need. Starting with the basic recording chain can be more efficient.
Microfon Studio Buying Guide
Before purchasing a microfon studio, ask yourself several questions.
What will you record?
If your main purpose is podcasting or voice-over, prioritize speech clarity. If you are recording singing or acoustic instruments, consider a microphone designed for detailed musical recording.
Where will you record?
A quiet, treated studio gives you more microphone choices. A noisy bedroom may benefit from a microphone that rejects more unwanted room sound.
Do you need USB or XLR?
USB is convenient for a simple setup. XLR provides a more traditional studio workflow and makes it easier to build a larger system.
What is your budget?
Set a total budget rather than spending everything on the microphone alone. The interface, headphones, stand, cable, pop filter, and room treatment can all affect the final result.
Frequently Asked Questions About Microfon Studio
What is a microfon studio?
A microfon studio is generally a studio microphone used to capture vocals, instruments, speech, podcasts, voice-over recordings, and other audio sources.
Is a microfon studio good for beginners?
Yes. A suitable studio microphone can be an excellent starting point for beginners, especially when combined with proper microphone placement and a reasonably quiet recording environment.
Which is better for a home studio, dynamic or condenser?
Neither is universally better. A dynamic microphone can be useful in an untreated or noisy room, while a condenser microphone can provide detailed recordings when the room is reasonably controlled.
Do I need an audio interface for a microfon studio?
If you use an XLR microphone, an audio interface is normally part of the recording chain. USB microphones can connect directly to compatible devices.
Can I use a microfon studio for YouTube?
Yes. Studio microphones are widely suitable for YouTube voice recordings, tutorials, reviews, podcasts, interviews, gaming content, and voice-over work.
Does room acoustics matter for a studio microphone?
Yes. The microphone captures the sound of the recording environment as well as the intended source, so reflections and background noise can affect the final recording.
How far should I place a studio microphone from my mouth?
There is no universal distance because microphones, voices, rooms, and recording styles differ. Start at a comfortable close distance and test several positions while listening to the recording.
Can a cheap microfon studio produce good sound?
Yes. Good microphone technique, room control, positioning, and recording levels can make a major difference. Expensive equipment cannot compensate for every recording problem.
Conclusion
A microfon studio is an important part of any modern recording setup, but choosing the right microphone is only one part of producing high-quality audio. The room, microphone position, audio interface, headphones, recording software, gain levels, and recording technique all contribute to the final result.
For beginners, the best approach is to start with the equipment that matches the intended use. A simple microphone, suitable interface, headphones, stand, and controlled recording environment can provide a strong foundation.
Whether you want to record music, podcasts, YouTube videos, voice-overs, interviews, or streaming content, investing in the right microfon studio and learning how to use it properly can significantly improve your recordings.
The goal should not simply be to own expensive equipment. The goal is to create a clean recording chain, control the recording environment, learn good microphone technique, and consistently produce clear and professional-sounding audio.